
1. Open the hamburger menu in the left upper corner and navigate to Admin -> Uploader.


The Uploader page will be displayed.
2. Click Build Template to get the template for uploading objects.

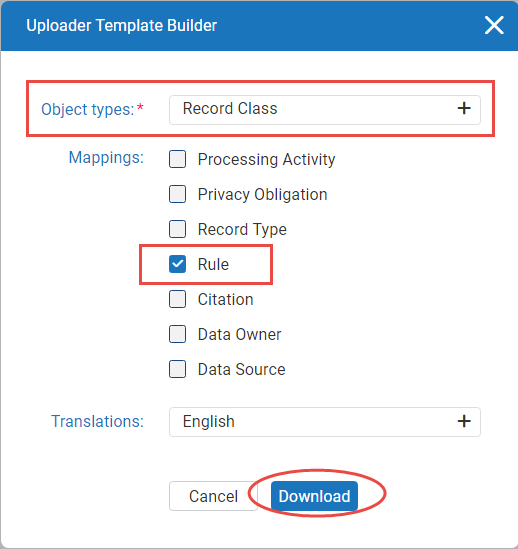
The Uploader Template Builder will show up. Select the type of retention object from Object types drop down.

3. Select the language of the uploaded retention object in the Translations field. Check the box for the type of mapping you wish to add in the Mappings field. Click Download.
The template for upload will be generated and downloaded automatically.
4. Fill in the data in the file. There are 2 templates:
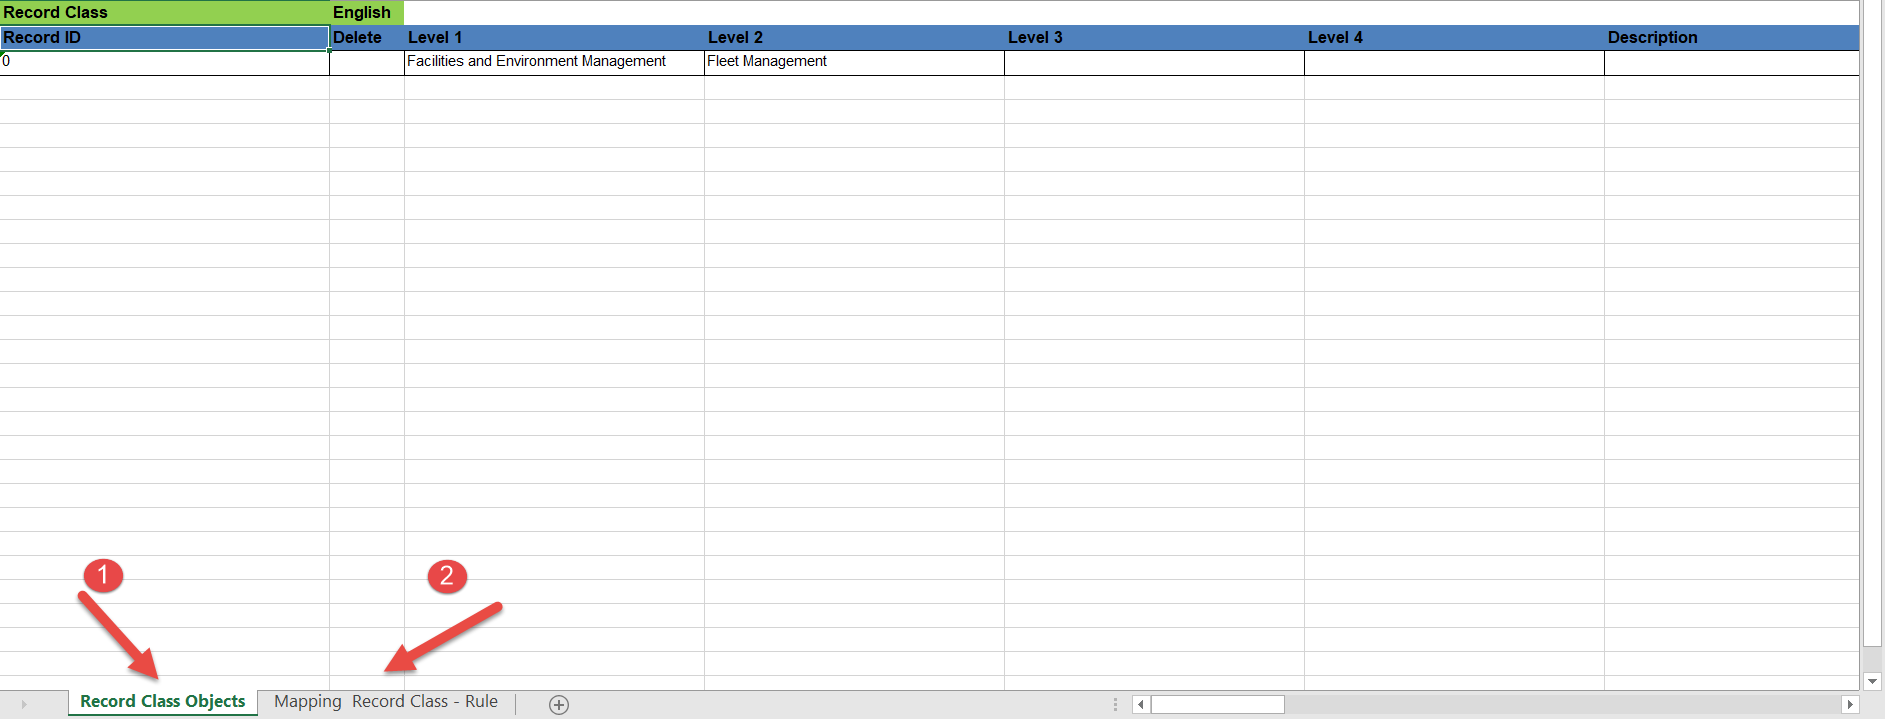
- for creating new retention objects (1)
- for creating mappings between new objects and existing (2)
5. The retention objects can be mapped by:
- Guid
- Code
- External Id
Specify any of this fields for both the retention objects (1) and mappings (2) template.


! The Guid, Code, External ID for new retention object should be unique.
! Follow format of Giud, Code, External ID.
- To get the Guid, code, external ID of the existing retention object, generate Data Uploader Template report.
6. Click the Choose File button and select the .xls file to upload from your computer. In the Open dialog, select the file on your computer and click the Open button.

7. Enable Additional Settings if required:
- Specify whether you want to append uploaded file to existing taxonomy without removing the existing taxonomy or not by checking or un-checking the box in the Clear existing retention objects before upload field.

8. Specify whether you want to validate file only without loading or validate and load it at once by clicking the Validate Data or Upload Data buttons.
9. Within the validation process the data in the template will be checked and the references to incorrect data will be given.

10. When the objects are added, the success message will appear.

Comments
0 comments
Article is closed for comments.