
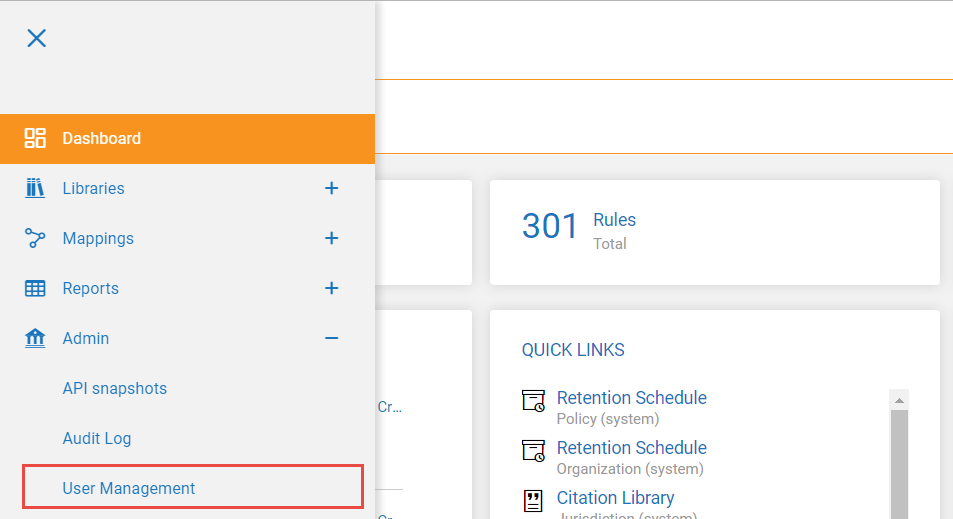
1. Navigate Admin > User Management.
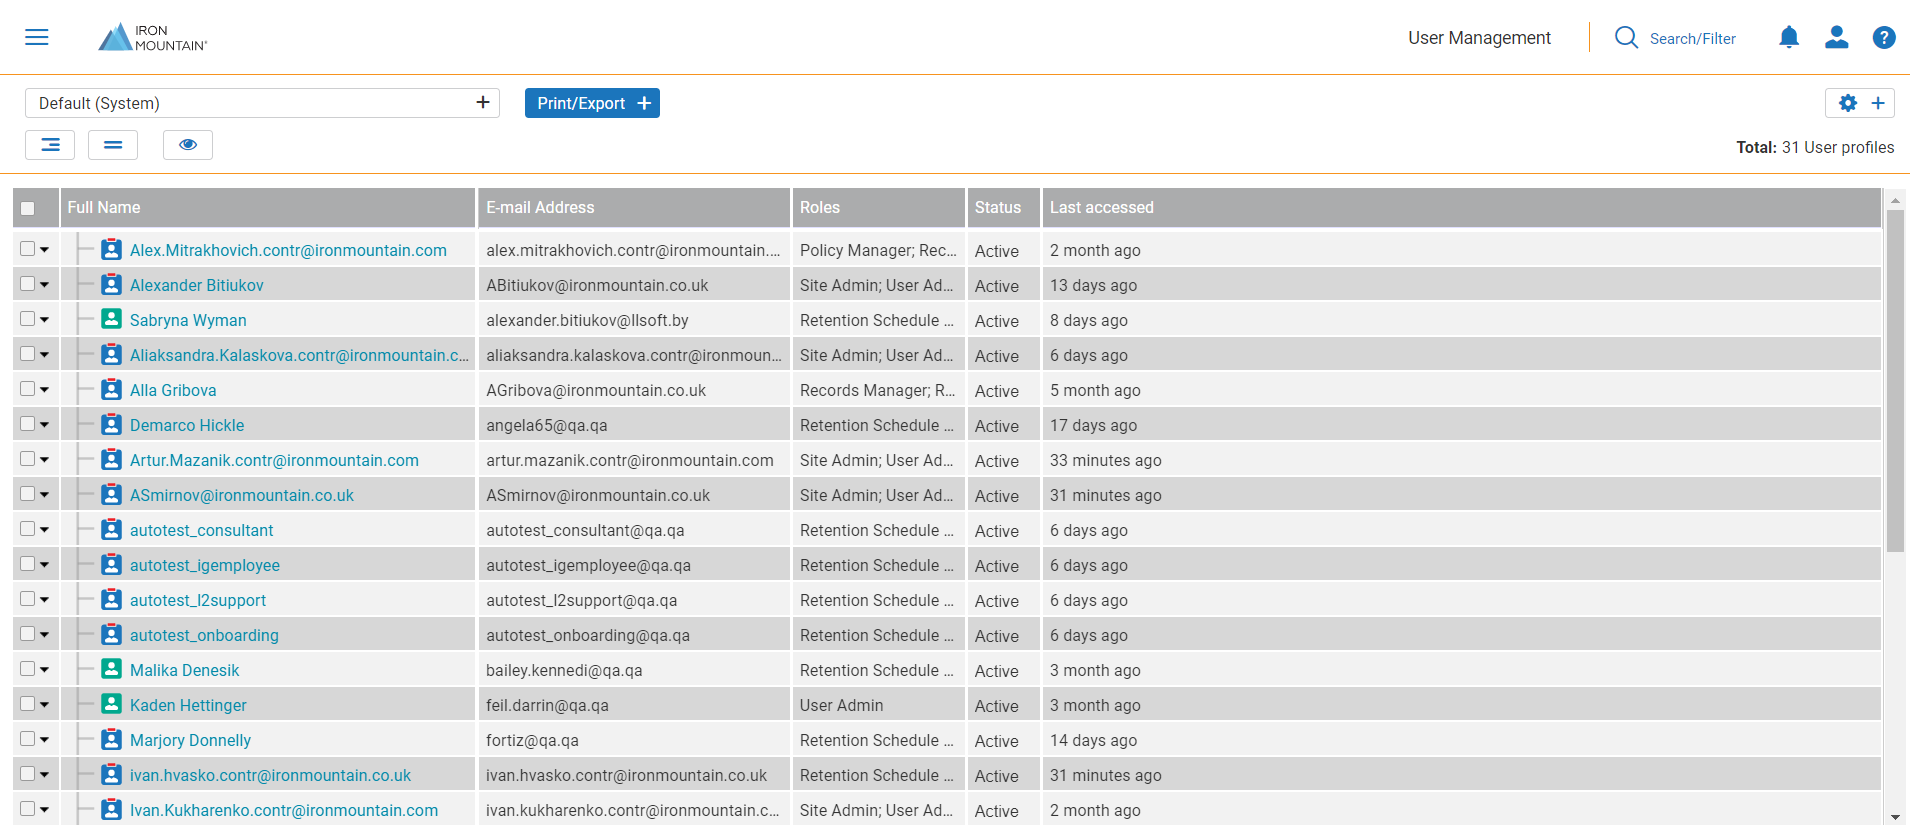
The page with the list of profiles will be displayed.
2. Open the user profile to edit.
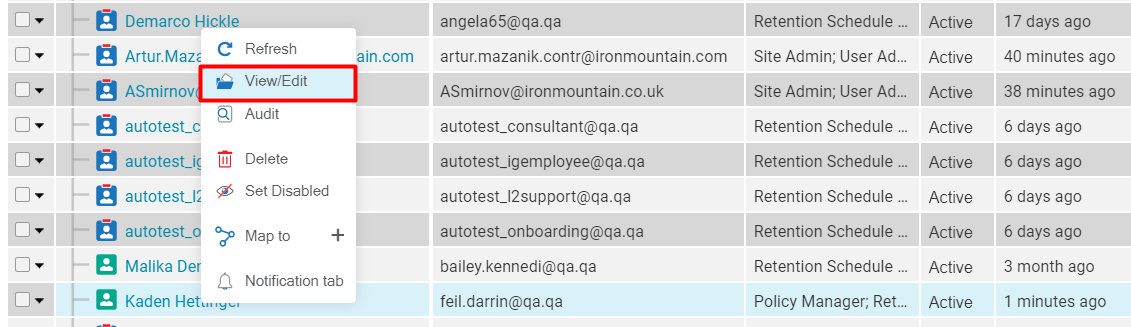
You can also right click on the row to open a popup menu with the View/Edit option.
3. The User Profile dialog box will be displayed. In the View/Edit left panel, click on the field of the user profile you wish to edit.
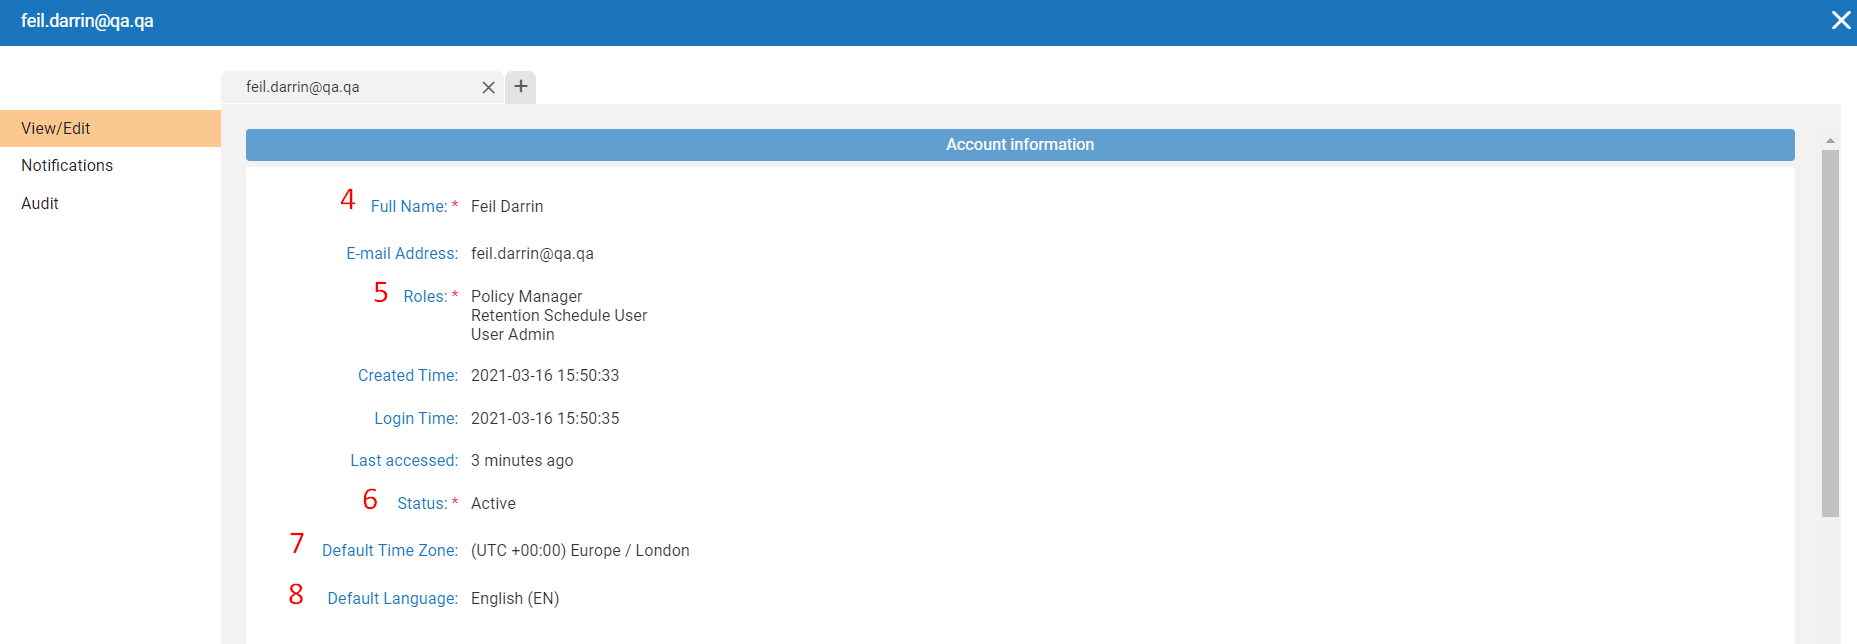
4. You can change the Full Name of a user. This text entry box can include first, middle and last names.
Note. Several fields cannot be edited once they have been set (when the user ID is initially created). These fields are Username, E-Mail, Created Time, Login Time, and Last accessed. If you want to modify the Username or the E-Mail address after the creation of the user ID, you'll need to create a new user account and delete or block the user ID that contains incorrect information.
5. The Roles refer to the user’s role in the current PCS application. The available options are Site Admin, User Admin, Data Map Manager, Legal Guest, GRS Curator, Privacy Administrator, Policy Manager, Records Manager, Retention Schedule User, Taxonomy Reviewer, Records Administrator, Record Coordinator, Business Process Modeler, Document Type Library Reviewer, Role Admin. You can select multiple roles for a single user also.
6. Specify the status of the user by toggling the button. The available options are Blocked and Active.
7. In the Account Information section, the Default time zone is based on the user's current local time. Dates and times throughout this site will be displayed using this time zone. If in doubt, choose the time zone that is closest to the user's location, which has the same rules for daylight saving time. Dates and times throughout this site will be displayed using this time zone.
8. For the Default Language field select the language, in which the PCS will be displayed for you. The drop down contains the languages, available on the instance.
Scroll down to enter further information in the Personal Information section.
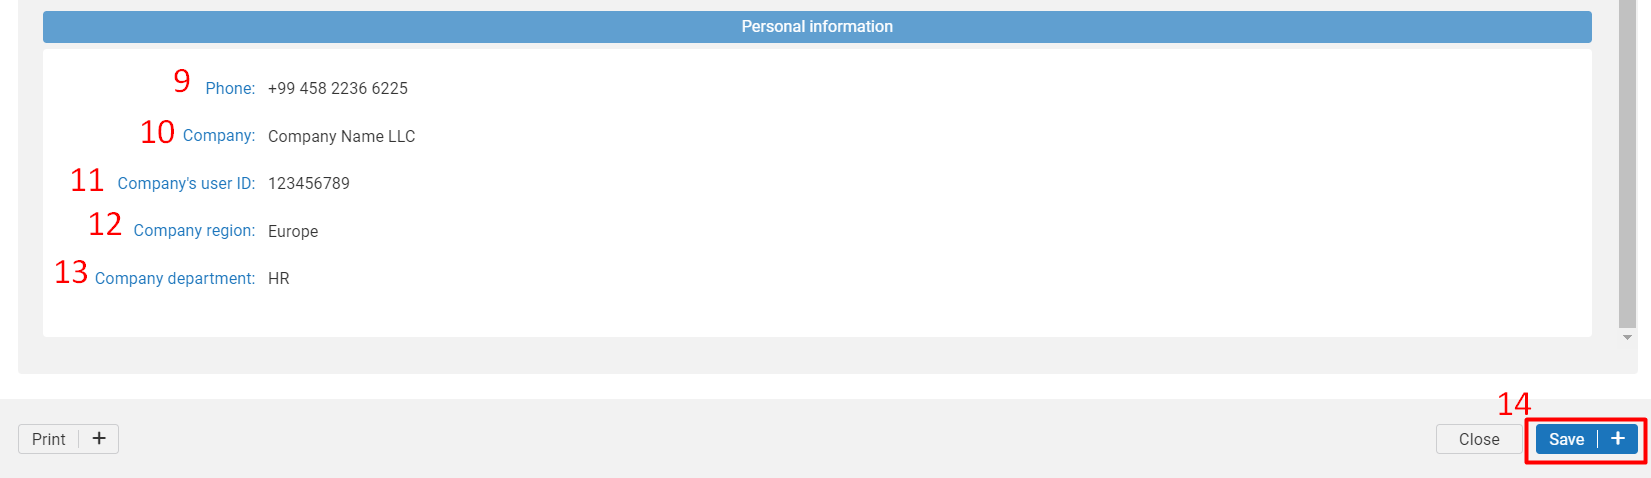
9. The Phone is the user's phone number. Enter the user's phone number in the Phone text entry box.
10. The Company is the name of the company in which the user works or belongs to. Enter the user's company name in the Company text entry box.
11. The Company's User ID refers to the user id of his/her company.
12. The Company region refers to the name of the region in which the user's company is located or registered. Enter the user's company region in the Company region text entry box.
13. The Company department refers to the department to which the user belongs. Enter the name of your department in the Company department text entry box.
14. Click the Save button.
15. You can also save changes by clicking the tick to the right of each field:
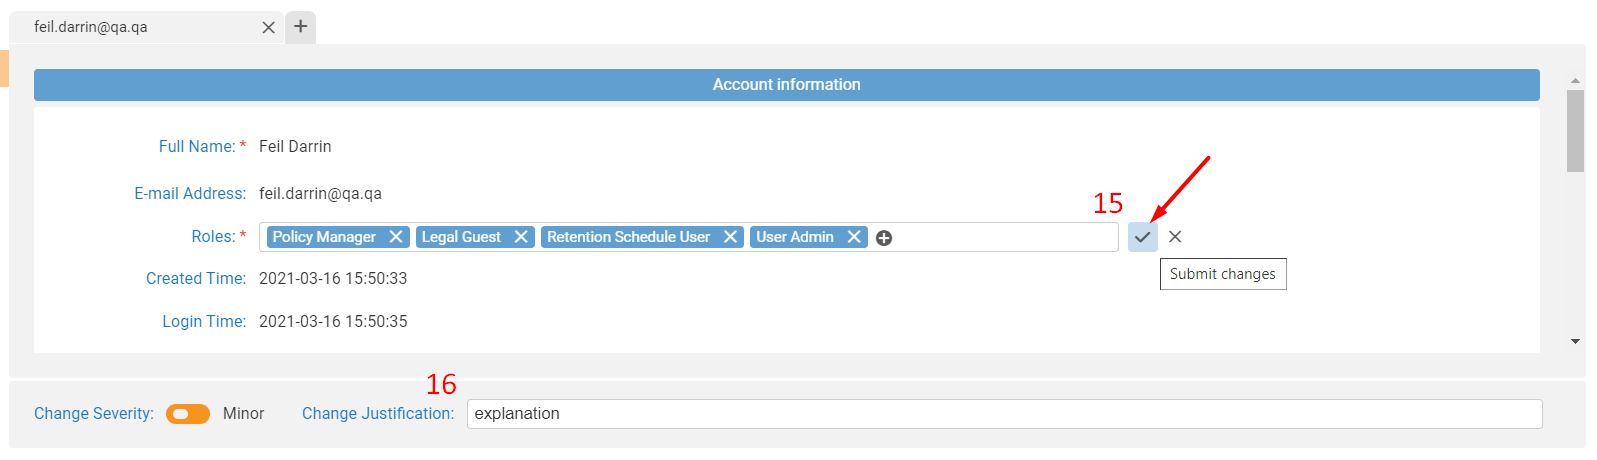
16. If necessary, you can add the justification text to the change you are making before saving the profile.
Comments
1 comment
As a reminder, if the User Name or Email address need to be corrected, you'll need to create a NEW user ID with the correct information. The system does not allow you to edit a User ID or email address after the User Profile has been established. Be sure to either Block or Delete the incorrect user account.
Article is closed for comments.